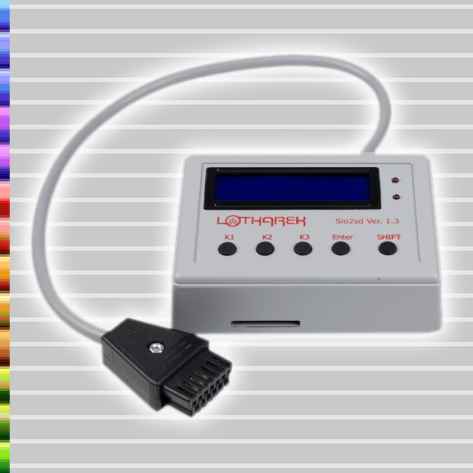
Of all my retro computers and consoles, my Atari 800XL will forever be closest to my heart. Like most systems these days, there is an SD card solution for running executables on it, called the SIO2SD. The awesome Lotharek produces a lovely, cased device, but others are available – or you can build your own!
The setup can leave novices a bit bamboozled, though. After some research and messing about with mine, I cobbled together these instructions (which assume you already have, or will have, firmware 3.x) to try and help people new to the device. Some of the basis of the info for the first couple of sections came from this site originally but have been reworded to clarify instructions.
File structure:
Place the Loader file in the root of the SD card, ensuring it is called: sio2sd.xex
Create a folder called ATARI that contains all of your files in whatever directories you wish.
Loader Instructions (v3.5):
ARROWS/JOYSTICK: select directory/file (.xex) or disk image (.atr)
RETURN/FIRE: enter directory/load file/disk image
KEYS 1-8: mount selected file/image into drives 1-8
ESC: go back through the directory tree.
X: (long press) restart computer with selected image(s).
CTRL+T: lets you toggle between real drives / virtual drives
Lots of software needs BASIC to be disabled. In this case, press and hold the OPTION key on your Atari, then press X to reboot and keep holding OPTION for a few seconds until the software starts to load.
To ensure the Loader software is run at each boot:
On SIO2SD double press SHIFT to get into Config mode.
Press K1 button until “cfgtool mode:” is displayed.
Press K2 button to select “every startup“.
Press K3 button.
Press K1 button until “topdrive mode:” is displayed.
Press K2 button to set it to “off“.
Turn off computer.
Turn on computer.
To upgrade firmware:
You MUST put the firmware on a standard SD card, SDHC or SDXC will not work.
Place the firmware file in the root of the SD card, ensuring it is called: sio2sd.bin
Turn on the Atari, either holding SHIFT down at boot, OR double-pressing SHIFT once booted to get into Config mode. Then press SHIFT-K3 on the SIO2SD. It will ask you to confirm the firmware update with K2.
Once done and you have seen an “OK” confirmation message, power off and on. The status display on the SIO2SD will tell you which firmware version you have.
thanks, I needed this info about what keys do what inside the programme.
LikeLike
You are doing God’s work. Completely new to the Atari 8-bit platform and didn’t have the slightest clue what to do with this thing. Thank you very much for the above.
LikeLike
You’re very welcome! I’m glad it helped you out!
LikeLike